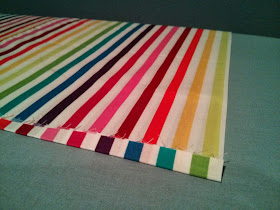
Instead of sharing a Pinterest-inspired project today, I have my own little tutorial to pass along.
What's the phrase: necessity is the mother of invention? Well, that's exactly what happened with this one. As I was planning Sam's shower, I knew that I wanted a table runner for the sideboard, but I didn't want to make anything permanent given that I'm not likely to make rainbows a permanent part of my decor.
So, here's how you make a temporary table runner (and add a few yards of pretty fabric to your stash).
First, you want to buy a length of fabric that corresponds to the length of your table. Two yards was just about right for me. Square up both ends of the piece of fabric.
Next, fold the fabric lengthwise with right (print) sides facing each other. The selvages should be touching.
Sew a straight line about 1/2 or 1 inch from the edge of the fabric along this long line. Do not back stitch at the start or end. Press your seam to set it.
Then, turn your fabric right side out and adjust it so that your seam is in the middle. Give your fabric a good press.
Now, we're ready to "finish" the ends. Fold 1/4 inch on the short end and give it a good press. Make another 1/4 to 1/2 inch fold and press again. Repeat on the other end.
Sew a straight line across the folds you just made only backstitching one or two stitches at the start and end.
Give your runner a good press. You're done! Once you're done using the table runner, you can take out your stitches, wash your fabric, and add it to your stash.
Note: My runner was a little too wide (but I didn't want to cut the fabric), so I pinned the corners back for a custom fit.


No comments:
Post a Comment