27 February 2013

Madeleine - Week 35

To fairly document something, you have to show the good, the bad, and the ugly. This week is a combination of the latter two. Today is Miss Madeleine's 8 month birthday, but she is one sick sweet girl. She has been enduring congestion and coughing since the weekend and a fever the last two days. Her doctor wants us to treat it at home until she has three days of fever, so we may be paying one of Madeleine's favorite people a visit tomorrow or Friday if things don't shape up quickly. 

In the development realm, Madeleine made big progress toward crawling on Monday when she figured out how to get her knees properly under her and move them. She is really just a wink away from moving forward! 


Note to mamas, mamas-to-be, and those shopping for the aforementioned people: In addition to the best nose sucker out there (also referenced here), consider treating your wee one to some Hanna Andersson pajamas. Because they're footless, they fit well for a long time. (Looks like they're having a sale at the moment, too!) We're lucky to have an outlet nearby, but (at least here) they are also plentiful on the secondhand market because they hold up really well. In fact, the ones M is wearing in the photo came from a secondhand store, have been worn by her for months, and still look brand new. 

And, no, I was not asked or compensated for my honest opinion about these two great products. :-)

25 February 2013

Painted Fireplace

I (finally) returned to DIY projects this past week. If you thought my DIY days were behind me now that we're in our new house, you're mistaken. I have a (long) list of projects to make our new house a little more home for us.

George and I decided to focus on our family room and kitchen areas first because we spend so much time in the space, and I'm going to share the projects as we tick through them. I don't know when it hit me, but at some point in the last few months, I realized that the original red brick in the family room had to go. We first imagined resurfacing the fireplace with a more modern stone, similar to what we have in the living room. Given the expense and inconvenience of such a project, I convinced George to let me paint the brick as a first step to improving the fireplace. If we hated the paint, I argued, then we could consider a more involved fireplace facelift.

A little guidance from these (1, 2) tutorials and three and half coats of Natura berkshire beige later, we are both really happy with the state of our brick. So happy, in fact, that we've forgotten about tile. 


BEFORE


AFTER


Don't worry: changing the wall paint color is on the list.

So, what do you think? I know that painting brick is controversial. Which team do you support?

23 February 2013

Madeleine - Week 34.5

Yep, I'm a half a week late on Madeleine's weekly photo. Instead of making excuses, I'll just give you the cuteness.


18 February 2013

Preserving Baby Cards...or Organized Card Hoarding

This project was a long time in the making. I started it during my first post-baby crafternoon with Misha back in July and just corrected/completed the project this weekend.

My mom saved all of my baby cards, and I want to do the same for our children. (Yep, hoarding runs in the family.) For my project, I was inspired by this post and Misha's wedding card collection.

Here is my version:


I didn't take photos along the way, but let me tell you about my process as it was a bit different than the inspiration tutorials. 

The front and back covers are scrap pieces of cardboard that I had stashed in my craft cupboard. Good sources of scrap cardboard include cereal boxes, books that are shipped with protective cardboard, calendars, sheets, picture frames, and undershirts. My scraps happened to be the right size for my project, just an 1/8 of an inch or so taller than the tallest card and about two inches wider than the widest card. I cut four pieces of scrapbook paper to the same size (7"x8.5") and adhered it to the cardboard with scrapbooking mounting squares. I decorated the front and used the same technique as Misha for my "m" embellishment. The colors I chose reflect Madeleine's nursery.

The heavy lifting in this project is the hole punching. I used the Crop-A-Dile recommended in the inspiration post, and it made easy work of the cardboard covers and of a stack of cards at a time. (I really, really, really wish I would have had this when I made our wedding programs and killed several regular hole punches in the process.)

I made this handy dandy template so that the holes would be uniform distance apart and distance from the edge of the card. Note that I originally thought I'd need four holes, but the outer holes only applied to a couple of cards, so I scrapped them.


I used the template to punch the holes in the cover, too, but I did so about an inch and a half from the edge. Make sense?

Once it all came together, the book seemed like it could use some extra structure, so I added a hole in the front and back covers for a ribbon. I know that the ribbon is going to fray with use, but I don't plan to open and close this book of cards very often.

Ta - da!


Do you hoard save cards? How do you keep them organized?

13 February 2013

Madeleine - Week 33

It's a two-photo week - lucky you! Just think of it as my way of passing along a little of the joy we get from our sweet Madeleine.

Seriously, she is so fun right now. (I know. I know. I always say that.) This morning we had a splashing good time at the pool, and right now she's covered in sweet potato and baby yogurt while shoving little puff treats in the direction of her mouth. Her food world is really opening up. In Vegas, we fed her some naan, and she's currently my taste tester as I develop a recipe for baby banana bread. On the mobility front, she is doing a lot of planking and getting less frustrated as she inches closer and closer to officially crawling. She continues to do well with signing, today adding "more" to her repertoire. To top it off, she has become a rock star sleeper, typically clocking 11 hours at night and at least two 2+ hour naps during the day. (She says, knocking on the nearest piece of wood.) Really, I just want to soak in every moment of our sweet girl. 

And now for some photos...


12 February 2013

Vegas, Baby!

This weekend we went to Vegas...with our baby! It was not the same Vegas experience that George and I enjoyed when we visited about a year and a half ago, but we still had a really good time.

Madeleine and I took our first solo flight on the way there. Mount Rainier kept us company.
We tried to take in the fountain show, but it was cancelled due to "high winds."
Madeleine was generally well behaved and patient.
We visited the Hoover Dam...
...and Lake Mead.
Madeleine was not terribly impressed but was patient.
The bypass bridge is impressive.
Back in Vegas, Madeleine fell asleep during a long walk on the Strip and tram rides.

She was pretty happy about stopping at In-N-Out on the way to the airport.

We also drove up to Red Rock Canyon, but Madeleine was in a foul mood and it was cold (37F!) so we didn't stay long. We managed to have a good visit and eat lots of seriously delicious food even if most of our meals did include a highchair. Good times.

Until next time, Vegas.

08 February 2013

Valentine Wreath

When we got back from New Zealand and I put away our few Christmas decorations, I started thinking about how I could make a few simple (emphasis on simple) Valentine's Day decorations. Immediately, my mind went to a wreath for the door, and I realized that I hadn't done anything with the wreaths from our old house.

Remember these cab sauv vine wreaths that I picked up on our law school graduation trip to Napa? (They're from this small business, which is sadly closing.)


There was only one problem: the dark vines weren't going to contrast with our dark front door. (They didn't contrast with our old doors, either, but I loved them too much to give them the boot.) Well, we only have one door now, so I decided that I'd use high gloss spray paint on one of the wreaths. After a million coats and a can of spray paint later, the wreath is pretty convincingly white.

To bring Valentine's Day to the wreath, I made a quick and simple bunting to drape across it.


Voila!


In hind sight, light grey might have been a better choice for the wreath so that the bunting would stand out while the wreath still contrasted with the dark door. However, for the hour or less I have invested in this project, I'll live with it and consider changing the color of the wreath down the road.

How are you decorating for Valentine's Day?

06 February 2013

Madeleine - Week 32

The weeks are clicking right by us...

Madeleine is currently fighting a cold and winning. As you can see, it hasn't gotten her down much, though it has encouraged her to sleep A LOT over the last few days. Anyway, today's photo is a little shout out to Uncle Heath as she sports jeans and a hoodie.


Sale!

Curious about the itti bitti d'lish diapers that we love? They're currently discontinuing last year's colors before releasing a whole new batch of fun colors next month. This means you can find them on sale various places including Kelly's Closet, which is currently running both the snap in ones and all in ones at 30-percent off! Hurry - they're already out of stock on a few combinations.

Enjoy your fluffy bums!

04 February 2013

Cloth Diapering: Our Experience & Product Reviews

Cloth diapering is a confusing world, so I'm sharing what I've learned over the last six months in hopes of helping others who are considering cloth diapering. Be sure to check out the basics, what you need to know to get started and maintain cloth diapers, the Gilbertson Family's experience, and traveling with cloth diapers. Today, I'm sharing our experience with cloth diapers and my review of a few products we've used...and learning that I don't have many photos of Madeleine's fluffy bum since the weather turned cold.

Our Experience
Sometime in my pregnancy with Madeleine, George and I became curious about cloth diapers. We were both raised on cloth diapers and had seen many of our friends use them but really didn't know where to begin ourselves. So, we attended an introductory class about cloth diapers; we walked away totally baffled by the options and wondering if the class leader was right when she said it was really as simple as a few extra loads of laundry a week (she was!). Eventually, we decided that we would buy cloth diapers for the first size and allow ourselves to back out at the end of the first size or if it got too hard.


I don't remember the exact thought process, but we ended up investing in several Thirsties Duo covers and a dozen prefolds. When I saw different diapers come across BabySteals or in good shape at a secondhand shop, I'd buy one to give it a try. I was also given two Lil Joey newborn diapers by a friend of a friend. So, when Madeleine was born, we had a stash of mostly prefolds and covers with a few random diapers.

For the first couple days of Madeleine's life, we used newborn disposable diapers. This made it easy to dispose of the nasty tar poo but made us realize this: disposable diapers are expensive, pile up quickly, and are a hassle to constantly buy. As soon as the meconium was gone, we added the Lil Joey diapers into the rotation (because they fold down in the front, they protected the umbilical stump just like disposable newborn diapers). Guess what - we (especially George) loved them!

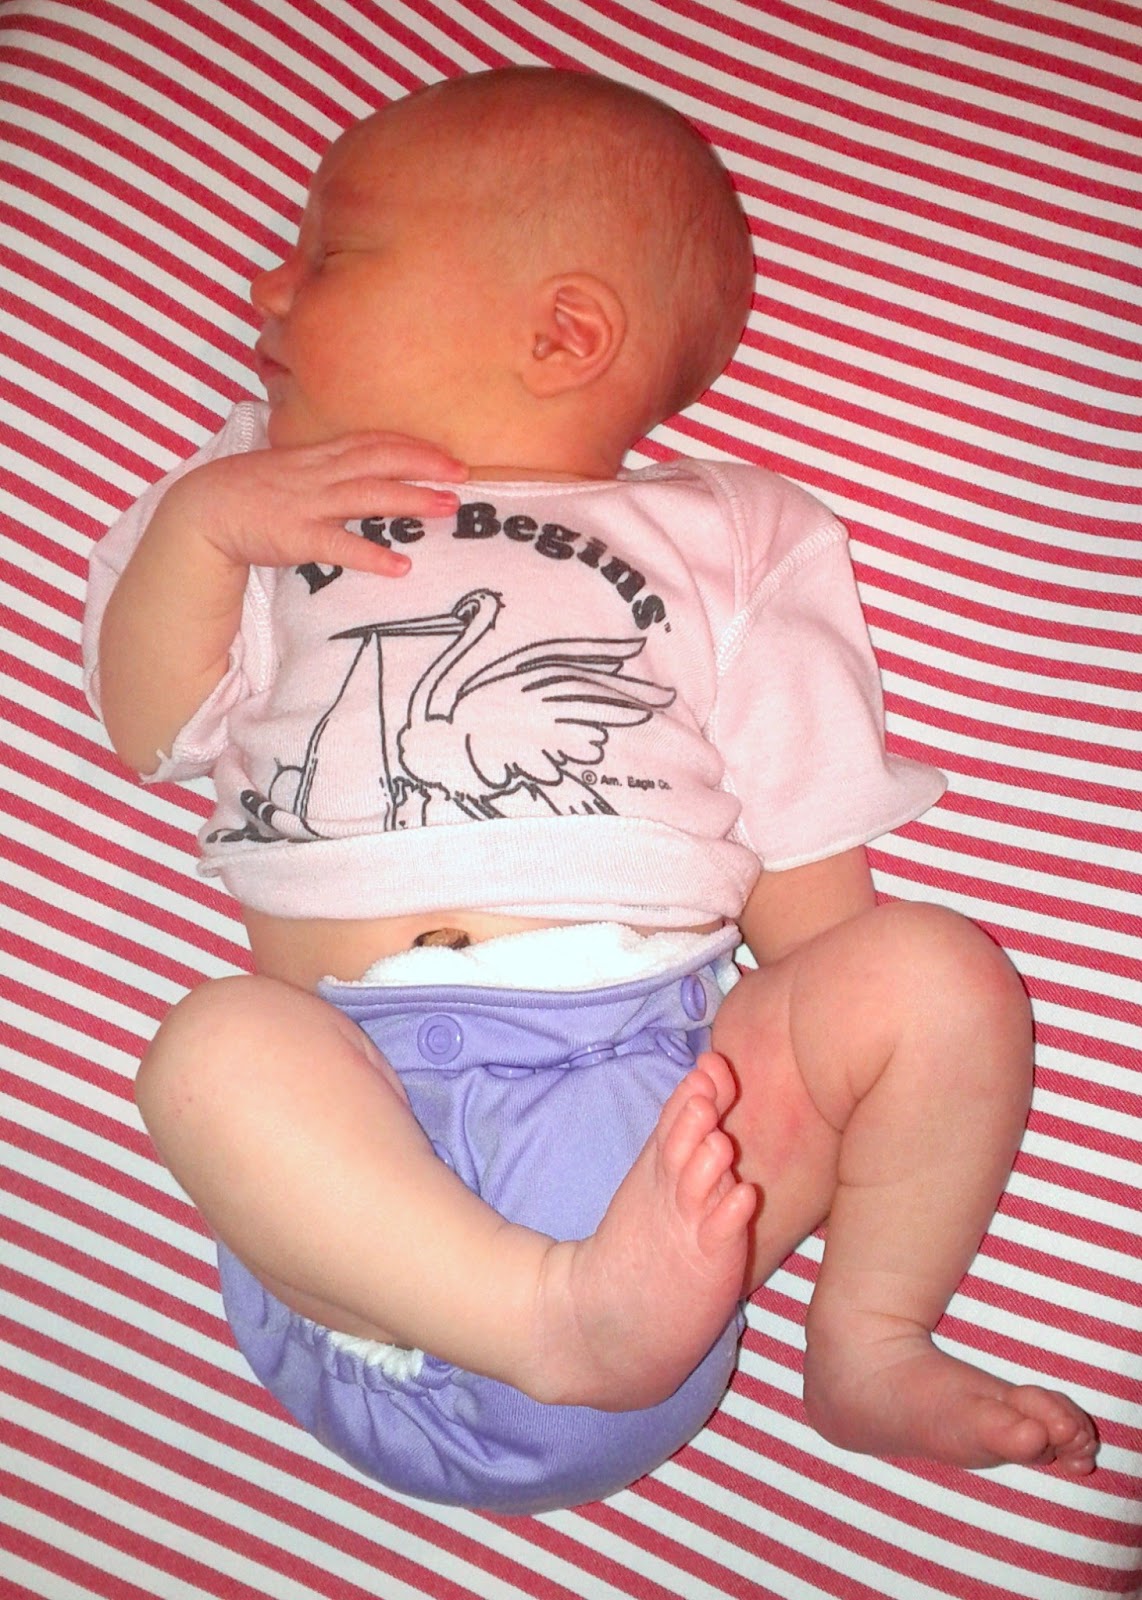
First Cloth Diaper: 3 Days Old

Credit

But...Madeleine was less than 8 pounds (the starting size for most cloth diapers) for the first several weeks of her life. Even after she was 8 pounds, the prefolds and covers were ridiculously big on her. They may have functioned fine, but she looked so uncomfortable with diaper all the way to her knees! So, we stayed with disposable diapers (and Lil Joeys as long as they fit) for a few more weeks.

Then, when Madeleine was six or seven weeks old, we visited a friend in Ohio whose daughter is a week younger than Madeleine and very similar in build. She told me how much she liked the Thirsties Duo All in One, and I saw that it fit Miss A nicely, even at her petite size. We came home, ordered a few Thirsties Duo All in Ones, and started cloth diapering full time. Remember our weekly photo to commemorate it?

As Madeleine got a bit older and a bit bigger, we added the covers and prefolds into the rotation as well as the random diapers I'd found on sale or secondhand. Using the covers and prefolds was always a bit of a chore because the all in ones were easier and provided a better fit. And through the collection of random diapers, I found our favorites: itti bitti d'lish. More on them below. I've recently taken the prefolds and covers out of the nursery because we weren't using them at all. And, because the itti bitti d'lishes and Thirsties are all sized, we're just a few pounds away from needing to replace most of our stash. I'm excited for more of our favorites and a few new brands. Any recommendations?

November

Are there times when we don't use cloth diapers? Yes. We put Madeleine in a disposable (our favorites) after her bath each night. If she gets a bad diaper rash, we pull out the Triple Paste (not safe for cloth diapers) and go to disposables for a day or three. When we travel and do not have access to washing facilities, we use disposables. We also keep a few disposables in the diaper bag for emergencies. Otherwise, I find using cloth diapers at home (with the system I described) and on the go (using a wetbag and otherwise adding them to the at-home system when we get home) is pretty easy.

A Few Product Reviews
Plant Wise Pail Liner: I use these in the pail and to carry the diapers to the laundry Santa style. These have held up to my use and a million washes and dries. My only problem was that the red one bled the first time that I washed it. Boo for pink diapers.

Thirsties Duo Wrap Cover: These are great as covers go. They have gussets around the leg, which are great for wee legs. The snap and hook and loop closures both held up to the little use we gave them.

Lil Joey by Rumparooz: These are a great introduction to cloth diapering. They're perfect for newborns because they can be snapped down in the front to protect the umbilical cord stump and are well designed to fit small frames. Unfortunately, they take a while to dry, too.

Thirsties Duo All In One: These are really easy all in ones to use. Their absorbancy is borderline for a heavy wetter. I wonder if the sizing snaps on the front are useful for anyone else because they were not for us. They are somewhat trim fitting and typically take two rounds of drying.

Charlie Banana One Size Pocket Diaper: This is one of the randoms that I acquired on sale. I love how stretchy it is, and I can imagine that it will fit Madeleine for a long time. We're at the point where it needs an extra booster to be absorbant. George doesn't like the pocket part of it because he can't get the insert stuffed into the narrow opening, but I think we can make it work as long as my smaller hands do the stuffing.

itti bitti d'lish all in one: I love the plush exterior of the diaper and the ease of its all in one form. It is extremely trim fitting (though not quite as much as the snap in one version). Because it's so absorbant, its drying time it toward the longer end.

itti bitti d'lish snap in one: This is our favorite diaper. The outer is plush and waterproof. The absorbancy can be customized by the layering of inserts. Even though it's sized, the inserts can be used in the larger sized diapers. Outers can be reused unless they're soiled or soaked, which limits the wear and tear on the outers (ours are still as nice as the day they arrived). Because they're in separate pieces, they dry quickly.

A Pep Talk
There are many ways to go about cloth diapering, and it doesn't have to be a complicated process. If you're curious about cloth diapering, I encourage you to buy a couple diapers and give it a try. Maybe you'll hate it and find yourself content in using disposables. Or, maybe you'll find that you love cloth diapering.

Come back soon to hear about how we use cloth diapers while traveling. In the mean time, feel free to leave questions, comments, or recommendations for new brands to try. Oh, and it must be cloth diapering season in our corner of the world because Emily at Daily Garnish just gave an update on her cloth diaparing experience. Check it out for yet another perspective.

The rest of the cloth diapering series:
   The Basics
   Getting Started & Daily Care
   Kendra, Greg, & Kenley's Experience
   Traveling with Cloth Diapers

01 February 2013

Cloth Diapering: Kendra, Greg, & Kenley's Experience

Welcome to the third post in this series discussing cloth diapers! Cloth diapering is a confusing world, so I'm sharing what I've learned over the last six months in hopes of helping others who are considering cloth diapering. Be sure to check out the basics, what you need to know to get started and maintain cloth diapers, our experience with cloth diapers, and traveling with cloth diapers.

For today's post, I asked Kendra, who blogs at The Gilbertson Family, to stop by and share her cloth diapering experience and wisdom. Welcome!


Hello! I'm Kendra...wife to Greg, and mama to Kenley. We are The Gilbertson Family. I am so excited to be a guest here today with Amanda to share our experiences with cloth diapers. I remember being pregnant and reading and reading about other moms' experiences, likes, and dislikes. Quite frankly, I love cloth diapering, so I will talk about it to anyone who will listen!

The main reason we decided to go the cloth diaper route was because the idea of throwing our money away (literally) by using disposable diapers really did not sound appealing to us. When I presented the idea [of using cloth diapers] to Greg, he was skeptical but willing to listen. Once he looked at the numbers, he was sold. Of course, we knew at the time there were so many other benefits and we have come to learn even more since we started using them, but we love not having to buy disposable diapers each month.

We made this decision fairly early in our pregnancy, which allowed us to keep our eyes peeled for good deals and put some of the cloth diaper essentials on our registry (score). One argument against cloth diapers is the upfront cost, so starting early helped. Fear not though, I am fully convinced that you can start cloth diapering at any point, even if your baby or babies are already here. It's never too late, in my opinion. So what are these "essentials" I speak of? Well, to begin...the diapers. Our stash consists of mainly BumGenius 4.0 pocket diapers, 23 to be exact. We also have 1 Blueberry, 2 GroVia All In One, 1 Bumkins All In One, and 1 BumCheeks Minky. All of our diapers are one size diapers, meaning they will grow with the baby, so you can use the same diapers throughout the diapering process and then use them again for future babies.


I tend to like the pocket diapers best for a couple reasons. First, you can create the perfect diaper depending on the number of inserts you want to use. We typically use a regular insert, a doubler (a thinner insert), and the cover to make one diaper. At night, we use the bamboo inserts with the Blueberry diaper cover to make it extra thick, since she's wearing them through the night. Second, the All In One diapers take longer to dry since there is more cloth attached to the diaper. The downside to the pocket diapers is the assembly (I like to call it stuffing). After each wash, we stuff the inserts into the covers to ensure the diapers are ready to use when we need them. You don't have to do this with the All In Ones; once they are dry, it's time to use them!

Pocket Diaper
All In One
As for the closures, we have mostly hook and loop. I wish we had a better mix between the hook and loop and the snaps. I have had the same experiences as Amanda with the different types of closures. In the early days with a squirmy baby, the hook and loop closures were the easiest to get on quickly. They do tend to wear out quicker in the wash than the snap closure. The snap closures are a little bit more difficult to get on, but they are not easy for a curious toddler to pull off. We got into the habit of sending the hook and loop diapers to daycare since they were easier, and we tend to use the snaps at home more. By the time we will need to use our stash of diapers again for another baby, I would like to convert the worn out hook and loop closures to snaps. There is a handy tool that will assist in this process.


As you can see, our stash is not very diverse, which is something I regret. Don't get me wrong, the BumGenius diapers are our favorite, and luckily they fit Kenley well. But, I think it's fun to try new brands and styles. The problem with that is that I don't NEED any more diapers; I just like them! I would recommend getting just enough to get you started; then you will know what you like and dislike when you want to add to your stash.

I will share the other essentials that we like and then give you a rundown on how the process works in the Gilbertson household. We could not live without our BumGenius Diaper Sprayer. I'm not being dramatic either. Believe me, we tried...for about 2 weeks. The button on our sprayer broke, but thanks to the manufacturer's amazing customer service, they sent us two new parts and instructions to fix it in the same day. The problem was that we were in the process of moving and having our mail forwarded. So, we waited and waited and waited...until I finally asked them to send the parts again. They graciously did and our sprayer is working way better than before, but the time in the between was not fun. The sprayer makes cleaning off the diapers so easy, so the nasty stuff doesn't even come close to getting into your washing machine. Some people choose to wait until their baby is starting solids to get the diaper sprayer, but we used it from day one, even when she was exclusively on breast milk.


We are very fond of the Planet Wise wet bags and Planet Wise pail liners. We have two of each. The pail liners go into the diaper pail to store the dirty diapers until it is time to wash. Our pail is just a trash can with a lid, purchased from Target, I'm sure. Our pail sits right by the toilet that our diaper sprayer is attached to. It is actually inside the bath tub, behind the shower curtain, out of sight since we don't use that shower right now. The wet bags are used at school and on the go. They store the dirty diapers when we are out and about and during the day until it's time to spray them off and toss them in the pail. In the beginning, we would only spray the dirty diapers and not the wet diapers, but since then, we had a rather horrible ammonia-smelling issue and found it helps to spray the wet ones too.

We wash our diapers every other day, usually in the evenings after work or bedtime. The cloth diaper detergent we like best is the Rockin' Green, but we also have a big container of this homemade concoction that works well too. A typical cycle in our front load high efficiency washing machine is one cold rinse/spin cycle, then normal wash on hot with the prewash and extra rinse option, then at least one, but sometimes two more, cold rinse/spin cycles. That may seem like a lot, but it honestly doesn't take that long. We are questioned a lot about our water bill after we started using cloth diapers. I would say it went up around $10 per month, but I am not convinced that is solely due to the cloth diaper laundry. I found myself doing loads and loads more laundry just by having a newborn baby in the house. After a wash cycle, the diaper covers get line dried and the inserts go into the dryer. I usually throw the All In One diapers into the dryer as well, only because they are the snap closures and I don't have to worry about the hook and loop closures wearing faster because of the dryer. Once the covers are dry, the stuffing begins.


Here are a couple random tidbits. At home, we use cloth wipes, which are really just cheap baby washcloths, and a spray bottle of water. We like these for a couple of reasons: they are cost effective and green. When you take the diaper off, it's habit to set the diaper and wipes aside together. When we did use disposable wipes, there were several times that the wipe ended up in the wash, which is super annoying. On the go, we definitely use disposable wipes because it's easy. If you're using cloth diapers, you have to be mindful of cloth diaper friendly diaper cream. Regular diaper cream repels liquid and when it gets on the diaper, the diaper will also repel liquid...not good. Our favorite cream is California Baby; however, I recently learned that coconut oil is cloth diaper friendly, and I really want to jump on this coconut oil bandwagon, so I will definitely be researching that for future use. We've found that the cloth diaper friendly creams are more mild than the regular diaper creams and sometimes they just don't cut it. If Kenley has a bad diaper rash, we'll switch over to disposable and use something stronger to get it cleared up. On that note, we usually have disposable diapers on hand at home for emergencies.

Overall, we have had a great experience using cloth diapers (if you haven't realized that already). Cloth diapers are economical, environmentally friendly, and adorable. The process may sound like a lot of work, but we quickly got the hang of it and do not even think twice about it anymore. I'd love to answer any questions you may have, and, if you have any suggestions on other brands I should try, I will add them to my wish list!

Thanks, Kendra! 


The rest of the cloth diapering series:
   The Basics
   Getting Started & Daily Care
   Our Experience & Product Reviews
   Traveling with Cloth Diapers